2 Models Available
How to Upscale Images to 4K with AI
Enhance image resolution up to 4x without losing detail. Choose an upscaler below for model-specific tips and quality comparisons.
AI 4K upscaling, in one sentence
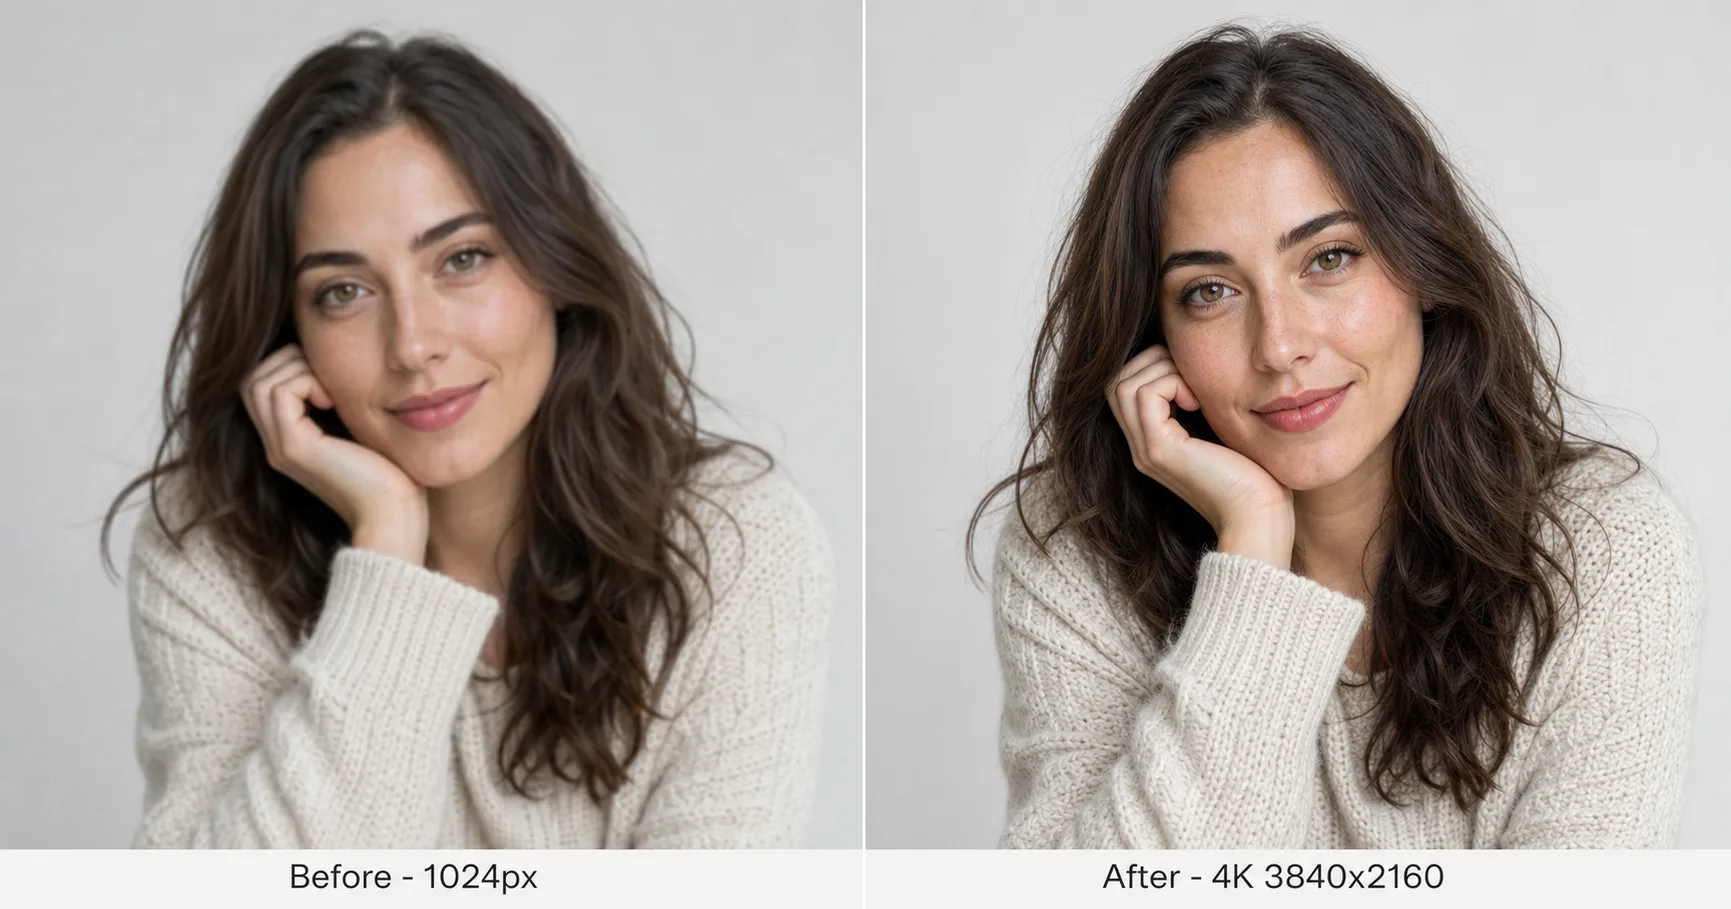
AI 4K upscaling increases an image to 3840x2160 pixels by reconstructing detail with deep-learning models, without the blur that traditional resizing produces. Instead of stretching the pixels you already have, an AI upscaler predicts the edges, textures, and fine structure that a higher-resolution capture would have contained — so a soft 1024px export comes back sharp at roughly 4096px.
On Martini you do this on an infinite, browser-based canvas: drop in an image node, wire it into an upscaler tool node, pick a scale, and export — no GPU, no local install, no separate desktop app. The same canvas can upscale a photo you uploaded, an image you just generated with FLUX.2 or Midjourney, or a frame you pulled out of an AI video. As of 2026, Martini exposes 50+ models across image, video, audio, and 3D, and the upscalers below sit in the same workflow as everything else.
Key takeaways
4K = 3840x2160 pixels. That is exactly 2x the linear width and height of 1080p (1920x1080), which means 4x the total pixel count — about 8.3 million pixels versus 2.1 million.
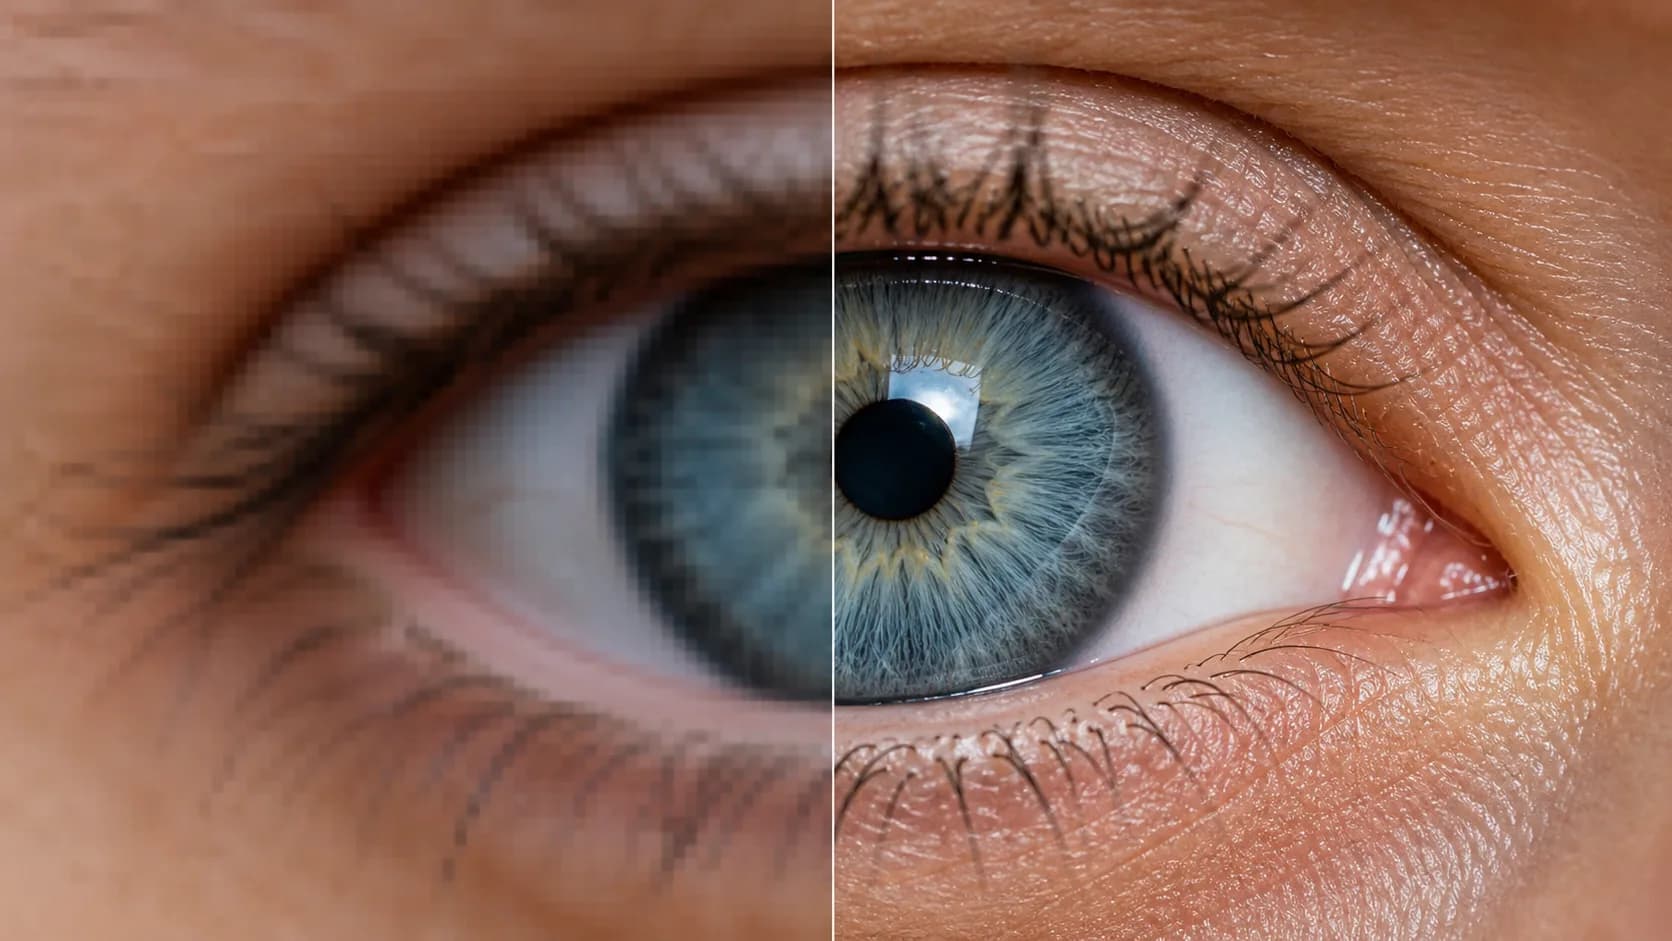
AI reconstructs detail; bicubic resizing does not. A naive enlargement just averages neighboring pixels and looks soft. An AI upscaler hallucinates plausible high-frequency detail, so edges and textures stay crisp.
Match the model to the job. Topaz is the faithful, photographic choice (near-zero hallucination); Magnific V2 is the creative choice that reimagines and embellishes detail. Use Topaz for portraits and product shots, Magnific for AI art.
Upscale as the last step in a pipeline. Generate at standard resolution where models compose best, then upscale — this beats generating at 4K natively.
For print, target 300 DPI. A 3840x2160 image prints cleanly at roughly 12.8 x 7.2 inches at 300 DPI.
The same canvas upscales stills and extracted video frames, so a 4K frame grab from Sora, Runway, Kling, or Nano Banana follows the identical workflow.
What 4K actually means: the resolution math competitors skip
4K UHD is 3840 x 2160 pixels. Most upscaling articles tell you to "upscale to 4K" without ever stating the number, so here it is as a citable fact: 4K = 3840x2160 = 8,294,400 pixels.
The jump from 1080p to 4K is a 2x scale factor, not 4x. People confuse this constantly. The width doubles (1920 -> 3840) and the height doubles (1080 -> 2160), but because both dimensions double, the total pixel area is 2 x 2 = 4x. So "4x more pixels" and "2x upscale" describe the same operation. When an upscaler offers 2x / 4x / 8x, those are linear scale factors: 2x quadruples the pixels, 4x multiplies them by 16, and 8x by 64.
Worked example: a square 1024x1024 AI image (about 1.0 megapixel) upscaled 4x linearly becomes 4096x4096 — roughly 16.8 megapixels and slightly larger than 4K in each dimension. A 1920x1080 export upscaled 2x lands exactly on 3840x2160. That is why "a 1024px image upscaled 4x reaches ~4096px" is a useful rule of thumb.
For print, resolution only matters relative to print size and DPI. The standard for sharp photographic prints is 300 DPI (dots per inch). At 300 DPI, a 3840x2160 image prints cleanly at 3840 / 300 = 12.8 inches wide by 2160 / 300 = 7.2 inches tall. Need a larger print? Either upscale further or accept a lower DPI — at 150 DPI the same file covers about 25.6 x 14.4 inches, which is fine for a poster viewed from a distance but soft up close.
Resolution math cheat sheet
Source            Scale   Result            Megapixels   300 DPI print
----------------- ------- ----------------- ------------ -------------------
1920 x 1080 (HD)  2x      3840 x 2160 (4K)  8.3 MP       12.8 x 7.2 in
1024 x 1024       4x      4096 x 4096       16.8 MP      13.7 x 13.7 in
1280 x 720        3x      3840 x 2160 (4K)  8.3 MP       12.8 x 7.2 in
2048 x 1152       2x      4096 x 2304       9.4 MP       13.7 x 7.7 in

Rule: 4K = 3840 x 2160 = 4x the pixels of 1080p (2x per side).
Print width (in) = pixel width / DPI. Photographic print DPI = 300.
How to upscale an image to 4K on the Martini canvas
The workflow is the same for an uploaded photo or an image you just generated. It is a five-step loop on one canvas:
Step 1 - Add your image. Drag a photo onto the canvas to create an image node, or generate one first with an image model (FLUX.2, Midjourney, Ideogram, Nano Banana) so the source already lives on the canvas.
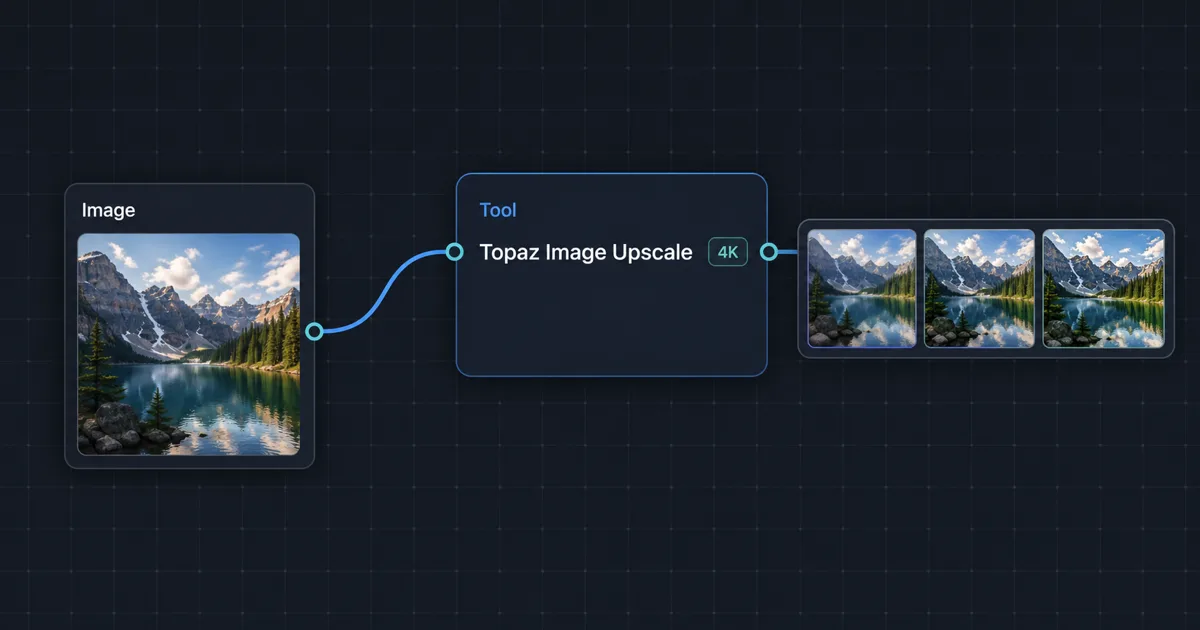
Step 2 - Add an upscaler tool node. Create a Tool node and pick an upscaler: Topaz Image Upscale, Magnific Image Upscale V2, Magnific Creative Upscale, Magnific Skin Enhancer, or Recraft Image Upscale.
Step 3 - Wire the image into the upscaler. Connect the image node output to the tool node input. The upscalers are zero-configuration — the model analyzes content (faces, text, textures, edges) and applies content-aware reconstruction, so there are no sliders to fight. Topaz outputs are sized by megapixel tier (four tiers up to very large prints); Magnific V2 covers a 2x to 16x range across three megapixel tiers.
Step 4 - Preview and pick the tier. Run it, zoom to 100%, and check the problem areas (skin, text, fabric). Because everything stays on the canvas, you can wire the same source into two upscaler nodes at once and compare Topaz vs Magnific side by side before committing.
Step 5 - Export. Export the 4K result as a PNG (both Topaz and Magnific V2 output PNG). From the canvas you can also feed the upscaled still onward — into a video model, a timeline, or an NLE/timeline export — instead of treating the upscale as a dead-end download.
Best 4K upscalers compared: Topaz vs Magnific vs Recraft
Most upscaling pages show one tool against itself. Because every upscaler lives on the same Martini canvas, you can run the same source image through several and compare the real outputs — not marketing crops. Here is how the main upscalers differ, and when to reach for each.
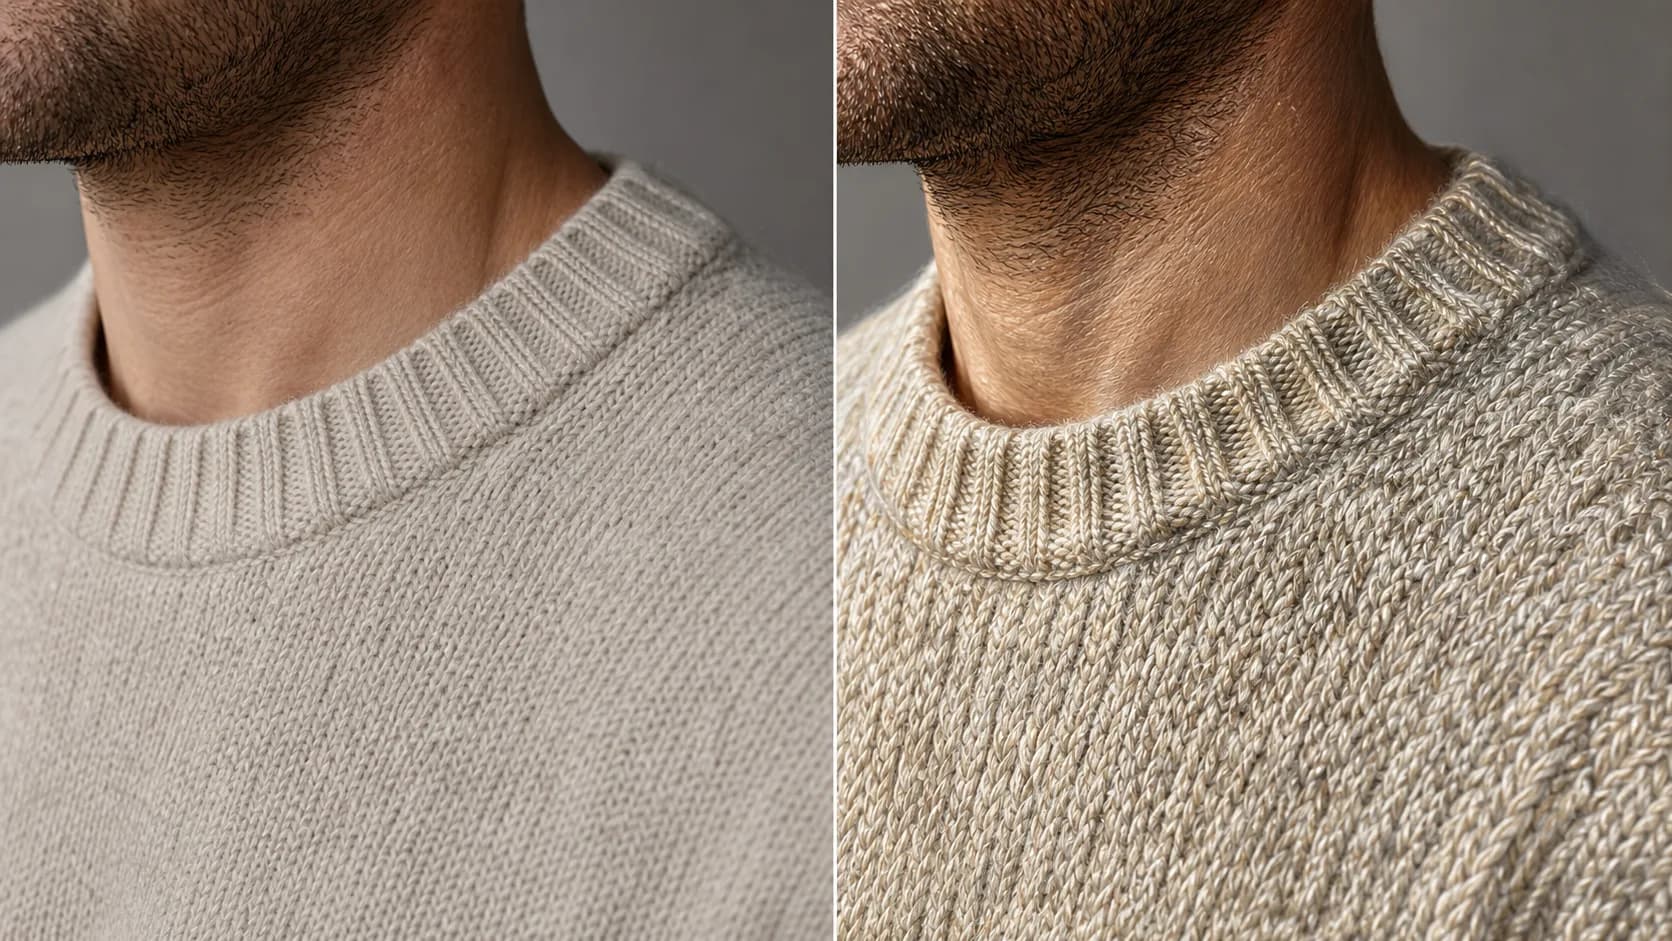
Topaz Image Upscale is the faithful, photographic standard. It reconstructs pores, thread, and edge detail with near-zero hallucination, so the result looks like the photo was captured at higher resolution rather than AI-enhanced. It is the only safe choice for portraits (it preserves facial features) and the right call for product and architectural photography. Zero parameters: the only lever is a better source image.
Magnific Image Upscale V2 is the creative upscaler. It does not just enlarge — it reimagines and embellishes, adding texture, depth, and richness beyond what the source contained (visible thread on fabric, extra foliage in a landscape). That is a feature for AI art, fantasy, and concept illustration, and a liability for documentary photography or faces, where it may alter details. Scale runs 2x to 16x.
Magnific Creative Upscale and Magnific Skin Enhancer are specialized variants: Creative adds prompt-guided style control during the upscale, and Skin Enhancer is tuned for portrait skin detail. Recraft Image Upscale is a fast, high-quality general-purpose option when you want a clean resolution bump without the creative reinterpretation. Pick the variant that matches the job rather than defaulting to one tool for everything.
Upscaler picker
Model                       Best for                    Hallucination   Scale     Output
--------------------------- --------------------------- --------------- --------- ------
Topaz Image Upscale         Photos, portraits, product  Near-zero       up to 4K+ PNG
Magnific Image Upscale V2   AI art, fantasy, concept    High (creative) 2x-16x    PNG
Magnific Creative Upscale   Stylized re-imagining       High + prompt   2x-16x    PNG
Magnific Skin Enhancer      Portrait skin detail        Low-moderate    flexible  PNG
Recraft Image Upscale       Fast general-purpose bump   Low             crisp     PNG

Rule of thumb: faithful = Topaz, creative = Magnific. Faces -> Topaz.
Use cases: portraits, product, and AI-generated art
Portraits (keep the identity). Faces are where upscalers most often go wrong, because adding "new" detail can change who the person looks like. Use Topaz Image Upscale for any portrait that must stay true to the subject — it reconstructs pores and hair without the waxy smoothing of lightweight upscalers and without altering features. When the goal is glamour-grade skin specifically, Magnific Skin Enhancer is tuned for that, but for headshots, IDs, and anything documentary, faithful Topaz is the safe default.
Product and e-commerce (keep the text readable). The give-away of a cheap upscale is a blurry label or warped small text. Topaz is content-aware: it sharpens product labels, signage, and fine type so they stay legible at 4K, which matters for marketplace hero images and zoomable detail shots. Avoid Magnific V2 here — it may add texture that was never on the real product.
AI-generated art (fix the "AI look"). Images straight out of a generation model are often beautiful but soft and relatively low resolution. This is where Magnific V2 shines: run a Midjourney or FLUX.2 output through it and the artistic interpretation compounds with creative upscaling, producing portfolio-grade detail neither model makes alone. The generate -> upscale pipeline on one canvas means there is no round-trip through a separate desktop app.
Upscaling AI video frames to 4K
The same upscalers work on frames you pull out of an AI video. A common 2026 workflow: generate a clip with Sora, Runway, Kling, Veo, or Nano Banana; extract the hero frame; then upscale that single still to 4K for a thumbnail, poster, or key-art. Because frame extraction and image upscaling both live on the Martini canvas, the source frame never leaves the workflow — see the extract-frames-from-video guide for the frame-grab half.
If you need the entire clip at 4K rather than one frame, that is a different operation: video upscaling preserves temporal consistency across frames so motion does not shimmer. Martini has dedicated video upscalers (Topaz Video Upscale, SeedVR Video Upscale, Wavespeed Video Upscaler Pro) for that — the upscale-video-to-4k guide covers choosing between them. Rule of thumb: one frame to 4K = image upscaler; whole clip to 4K = video upscaler.
Avoiding artifacts and the over-sharpened "fake" look
Over-sharpening is the most common upscale failure: halos around edges, plasticky skin, and crunchy noise that scream "AI-enhanced." It usually comes from pushing a low-quality source too hard, or using a creative upscaler where a faithful one belonged.
Three habits prevent it. First, match the model to the content — Topaz for anything that must look authentic, Magnific only when creative embellishment is welcome. Second, fix the source before you scale: a noisy or over-compressed input gives the upscaler bad detail to amplify, so a cleaner or slightly higher base resolution always beats a heavier upscale. Third, do not over-target — web images rarely benefit from anything above 2K, and only print and large-format work truly needs 4K, so picking the smallest tier that meets the use case keeps results natural and render times short.
Finally, judge at 100%, not fit-to-screen. Zoom into faces, text, and fine textures; if an area looks artificial, the source was likely too low-quality and the better fix is regenerating it at a higher base resolution rather than upscaling harder.
Choose a Model to Get Started
Upscale Tools
Topaz Image Upscale
Topaz Image Upscale is the industry standard for faithful upscaling — it reconstructs textures, edges, and fine details in a way that looks genuinely high-resolution rather than AI-enhanced. Where Magnific V2 creatively reimagines and embellishes details, Topaz preserves the original image character with near-zero hallucination. This makes it the right choice for photography where authenticity matters: product photos, portraits, architectural photography, and any image that needs to look like it was captured at higher resolution, not generated.
Upscale Tools
Magnific Image Upscale V2
Magnific V2 is a creative upscaler — it doesn't just enlarge an image, it reimagines and embellishes details at higher resolution. Where Topaz faithfully preserves what was in the original image, Magnific V2 actively adds texture, depth, and richness that go beyond what the source contained. Fabric gains visible thread patterns, skin shows pore detail, landscapes acquire additional foliage and atmospheric depth. This makes it the superior choice for AI-generated art, illustrations, and creative images where enhanced visual richness improves the result.
Frequently Asked Questions
How do I upscale an image to 4K with AI?
Add your image to the Martini canvas, wire it into an upscaler tool node (Topaz, Magnific V2, or Recraft), pick a scale up to 4K (3840x2160), preview at 100%, and export the PNG. The same five-step flow works whether the image was uploaded or generated on the canvas.
What resolution is 4K (and how many pixels vs 1080p)?
4K UHD is 3840x2160 pixels = about 8.3 megapixels. That is exactly 2x the width and 2x the height of 1080p (1920x1080), which works out to 4x the total pixel count of 1080p (8.3 MP vs 2.1 MP).
Does AI upscaling make images look fake or over-sharpened?
It can if you use a creative upscaler on photographic content or push a low-quality source too hard. To keep results natural, use a faithful upscaler like Topaz for photos and faces, clean up the source before scaling, target the smallest tier the use case needs, and judge the result at 100% zoom.
Can I upscale an AI-generated image to 4K for print?
Yes. Generate at standard resolution, then upscale 2x-4x to reach 3840x2160 or higher. At 300 DPI a 3840x2160 image prints cleanly at about 12.8 x 7.2 inches; for larger prints upscale further or accept a lower DPI such as 150 for posters viewed at a distance.
Which is better for 4K upscaling — Magnific or Topaz?
Topaz is better for faithful photographic work (portraits, product, architecture) because it reconstructs detail with near-zero hallucination. Magnific V2 is better for AI art and illustration because it creatively reimagines and embellishes detail. On Martini you can run both on the same source and compare side by side.
Can I upscale frames from an AI video to 4K?
Yes. Extract a frame from a Sora, Runway, Kling, or Nano Banana clip on the canvas, then run that single still through an image upscaler to reach 4K. For the entire clip at 4K, use a dedicated video upscaler (Topaz Video, SeedVR, or Wavespeed) instead, which preserves temporal consistency across frames.
What DPI do I need for a 4K print?
Use 300 DPI for sharp photographic prints. At 300 DPI a 3840x2160 (4K) image prints at 12.8 x 7.2 inches; print width in inches equals pixel width divided by DPI. For larger formats viewed from a distance, 150 DPI is acceptable and roughly doubles the print dimensions.
Is there a free way to upscale images to 4K?
Martini runs on dual-balance credits, so you can try AI 4K upscaling without buying hardware or a desktop app — the upscalers (Topaz, Magnific, Recraft) are metered by output megapixels. There is no install and no GPU required; you upscale entirely in the browser on the same canvas as your other AI work.